5 Steps to Organize Your Pantry
If your pantry is is a trouble spot in your kitchen, I’ve got a few tips for making it work for you! Here are 5 steps that will take your pantry from overwhelming to organized.
First, I want to show you a picture of our pantry. This is our pantry – not freshly organized. This is what our pantry looks like 90% of the time. I wish I had a photo of our pantry perfectly put together, but I almost like it better this way.
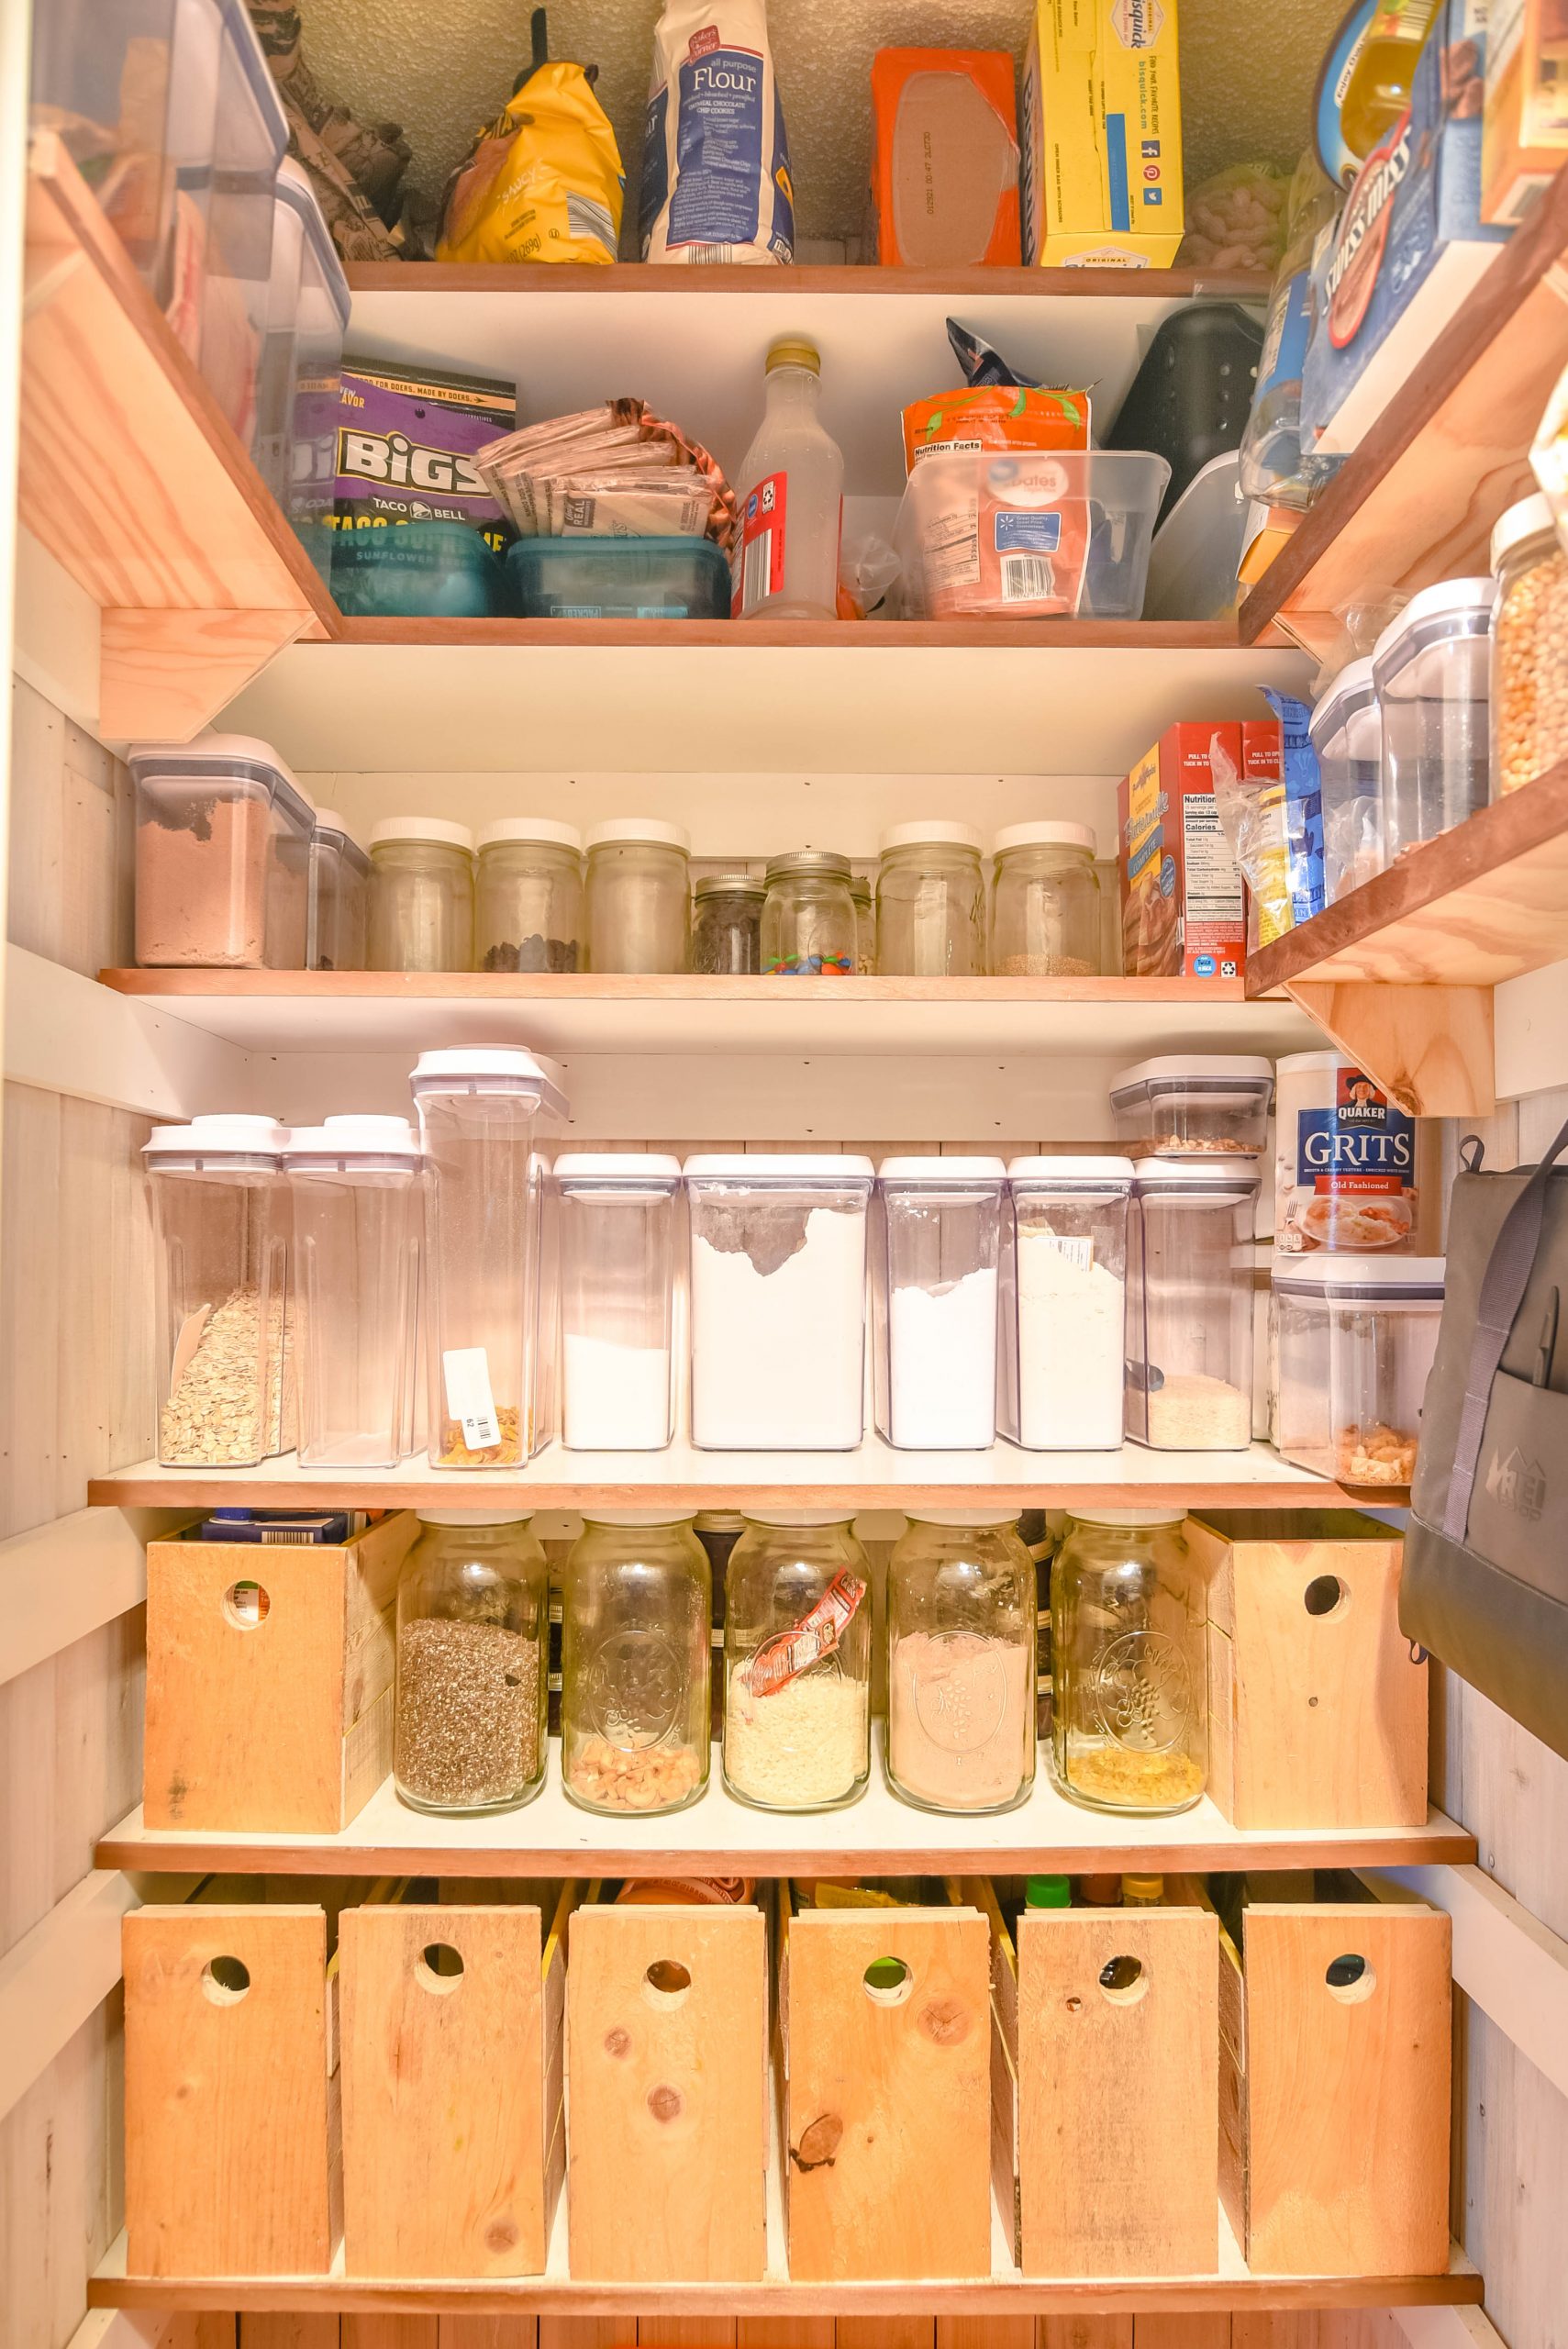
If we get busy, we’ll come home from the grocery store and toss everything in the pantry without putting things all the way away. But everything has a place, so it only takes about 5 minutes to get it back to looking like this. It’s not perfect, but it’s so accessible and easy to use. Here are 5 tips for resetting and organizing your pantry.
5 Steps to Organize Your Pantry
Step 1 – Empty Your Pantry
The first step is to take everything out of your pantry – and I mean everything. The idea is to start with a clean slate. So tell your family that you’re ordering pizza for dinner, take over the kitchen, and get everything out of the pantry.
Step 2 – Deep Clean
Of course, deep cleaning means wiping off the shelves and vacuuming or mopping the floor. But this is where we’re going to take the time to put back anything that has migrated to your pantry that doesn’t belong there. If you don’t want it to live there, go put it away. In our pantry, this meant things like medicines – Tylenol, Advil, etc. that needed to go back to the bathrooms, birthday candles that went back to the birthday box, and sandwich baggies that belong in a different drawer.
Also in this step, throw out anything that has expired. Condense your 5 non-expired half-used bags of powered sugar into a single bag (Just me? Nevermind!). And throw away things that you will never really use – like that bottle of sauce you bought because you saw it in a recipe on Pinterest, but didn’t really like it and now feel bad about throwing it away. I’m giving you permission – just throw it away.
Step 3 – Measure and Purchase Containers
It’s important to clean everything out and measure before your purchase containers. If you buy containers to fit what’s already in your pantry, you’ll wind up with a mess. If you pick out your containers first and then see what will fit in them, you will be more intentional with your purchases and know that everything will fit in your space.
But don’t think you have to buy all new – shop your house first. You might have a few baskets that are the perfect size or some jars you can repurpose.
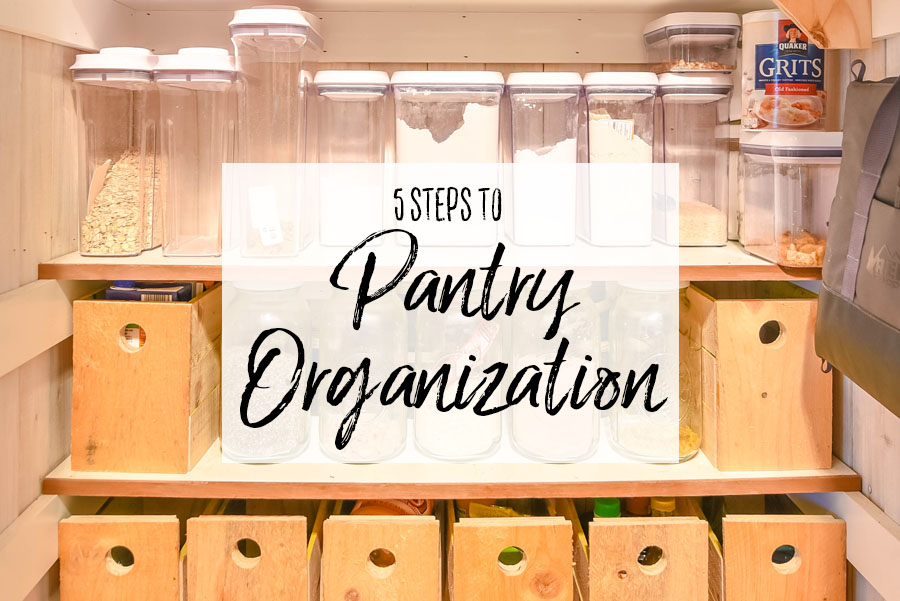
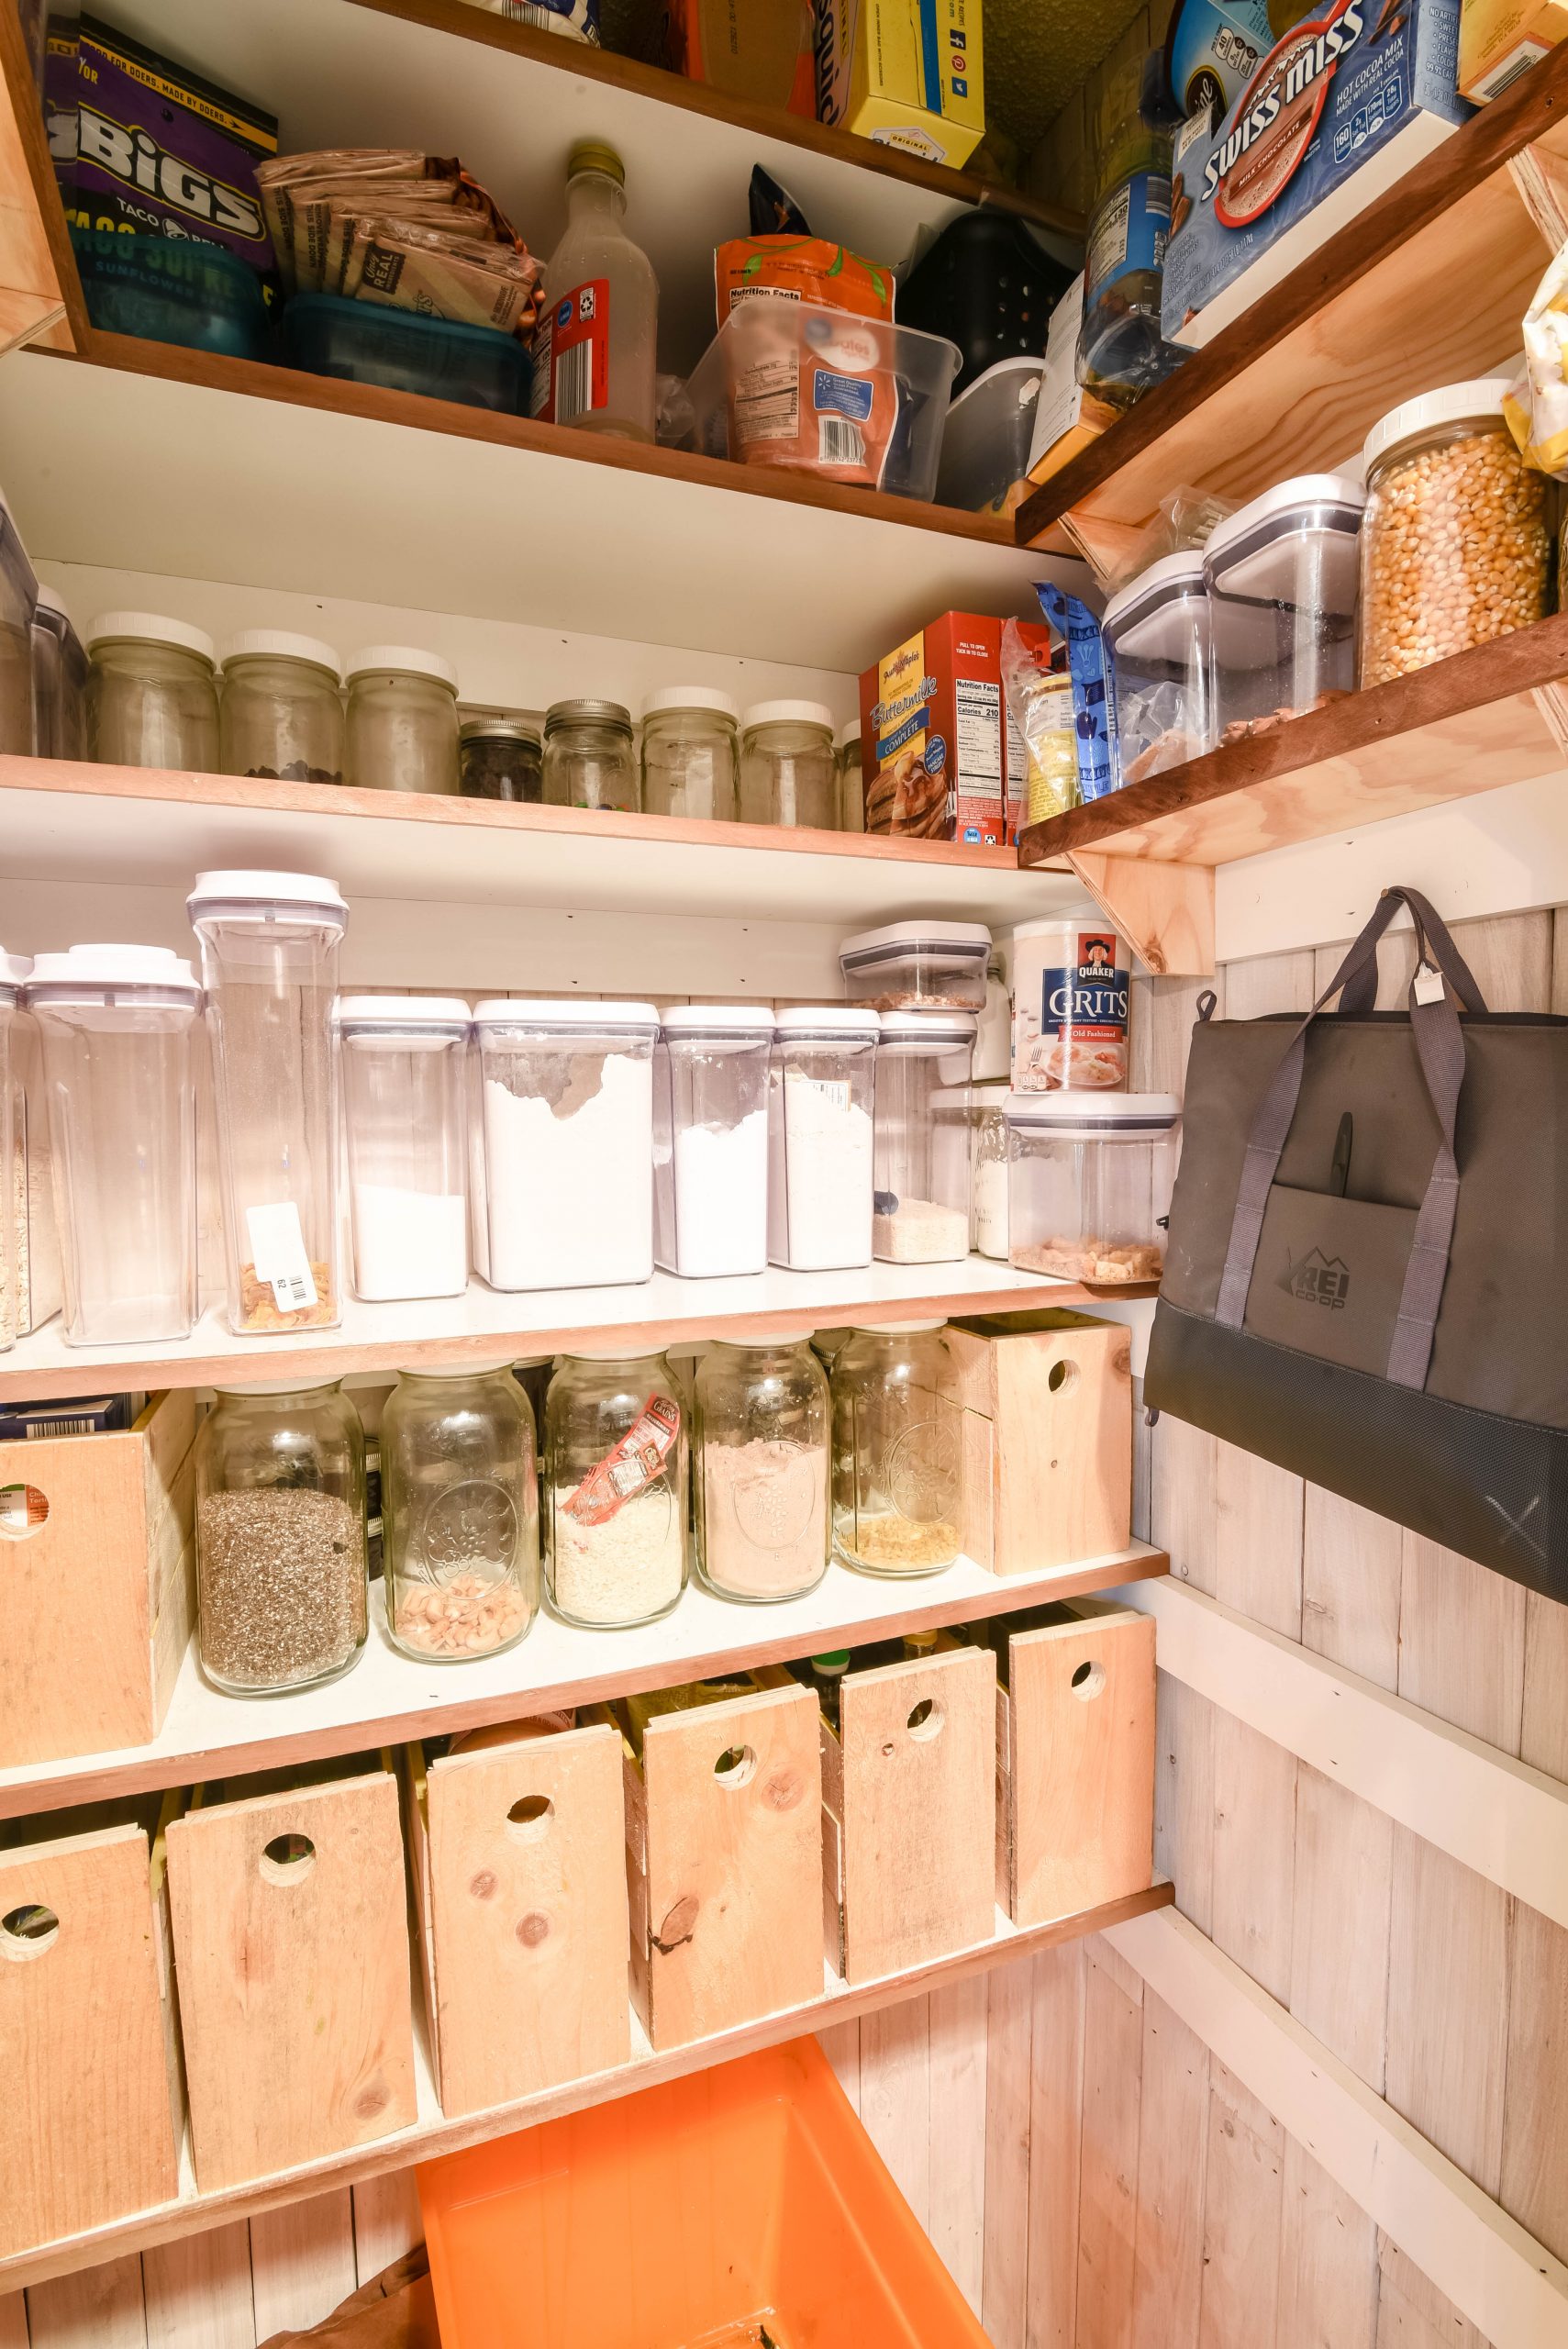
So, I used some OXO Containers that we already had from a couple of years of Black Friday shopping thanks to my deal-finding mom. They were the perfect fit for our space. I invested in a few of the OXO Cereal Containers because I loved their functionality and durability. I also purchased some very large mason jars. I love the look, they were the perfect height, and they are by far the cheapest storage solution. I love making mason jars a little easier to use daily by adding the plastic one-piece lids. Here are the things we used:
- OXO Pop Containers – Large for Flour, Tall Thin for Baking Goods, Short Thin for Everything Else
- OXO Cereal Containers – Small
- OXO Cereal Containers – Large
- Half Gallon Mason Jars (Amazon always changes their prices on mason jars – check with your local stores, too)
- Pint Mason Jars
- Wide Mouth Plastic Mason Jar Lids
We finished with some simple boxes that I asked Daniel to make to store cans.
Step 4 – Get Rid of Boxes and Labels
This might just be a problem for introverts, but I get very overwhelmed when I’m looking at a sea of words. My goal in this pantry renovation was to get rid of as many words as possible. I love taking things out of the packaging and putting it into pretty containers as soon as I get home from the store.
This also makes it so much easier to see what I’m out of when I’m filling out my grocery shopping checklist.
Step 5 – Sort by Type
Dinner prep will be much easier if everything you need is in one place. Group all of your baking supplies together. Put your sauces and condiments in one place. Designate a spot for tomato-based cans, bean-based cans, and soup cans. Set aside a box for drink mixes.
If there’s anything you want your kids to have easy access to, make sure they can reach it. I put cereal, oatmeal, and ‘healthy’ snacks on a lower shelf they can access whenever they want. I put ‘treats’ up higher so they have to ask permission before grabbing one.

I hope this makes organizing your pantry for every day life a little less overwhelming. It doesn’t have to be a monumental task that’s impossible to keep up. If you keep things simple, you’ll be able to keep your pantry organized in daily life. It just takes a little effort in the beginning. Let me know what questions you have!
I love the combination of wood, glass & OXO. I’m jealous!