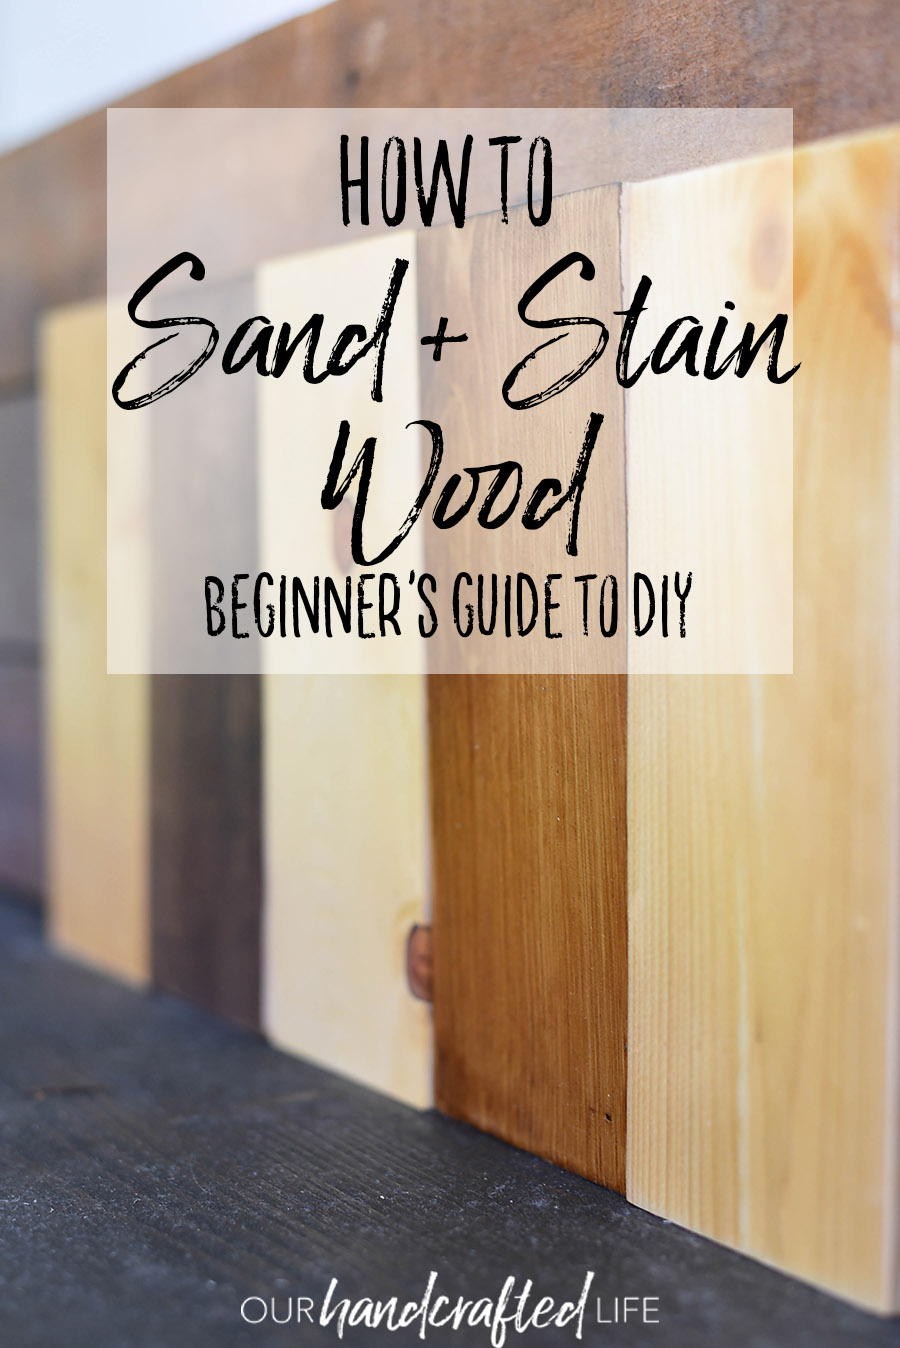
Beginners Guide to DIY: How to Sand, Prep, and Stain Wood
How to sand, prep, and stain wood – a beginner’s guide to DIY woodworking.
How to Sand, Prep, and Stain Wood
Laying a good foundation can make a huge difference in the outcome of a project. Learning the proper way to sand, prep, and stain wood will help each project go smoother and quicker.
Sand the Wood
Sanding wood isn’t always the most fun part of a project, but it will make a huge difference in your end result. First we are going to talk through the process of sanding then we’ll look at some tools that can make sanding easier.
Choosing Sand Paper
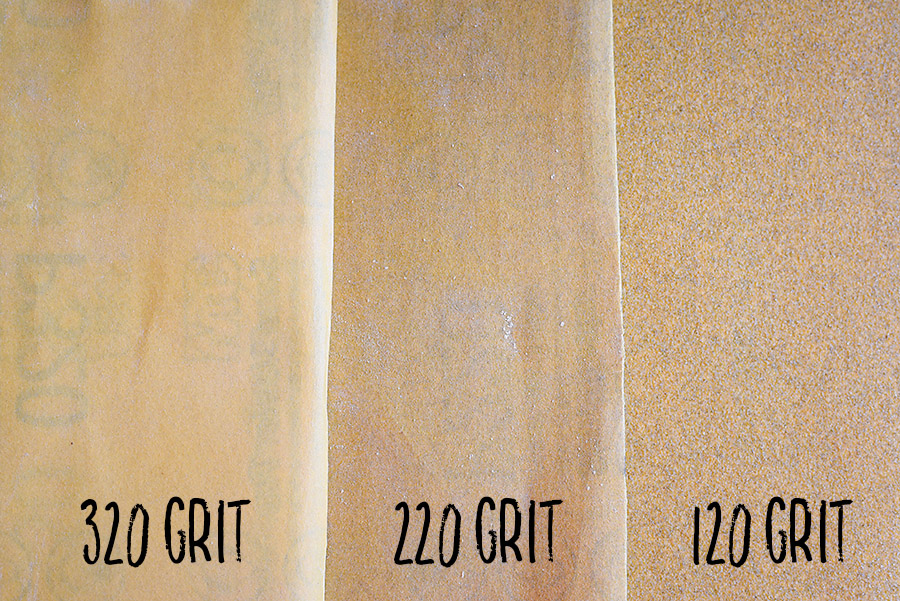
When you buy sandpaper, you’ll notice the grit number. This number represents the number of sand granules per square inch. Basically, the lower the grit, the rougher the sand paper. Course sand papers with low grit will take off more wood and leave a rougher surface. Fine sandpapers with a high grit won’t take off as much wood, but they will leave a smoother surface.
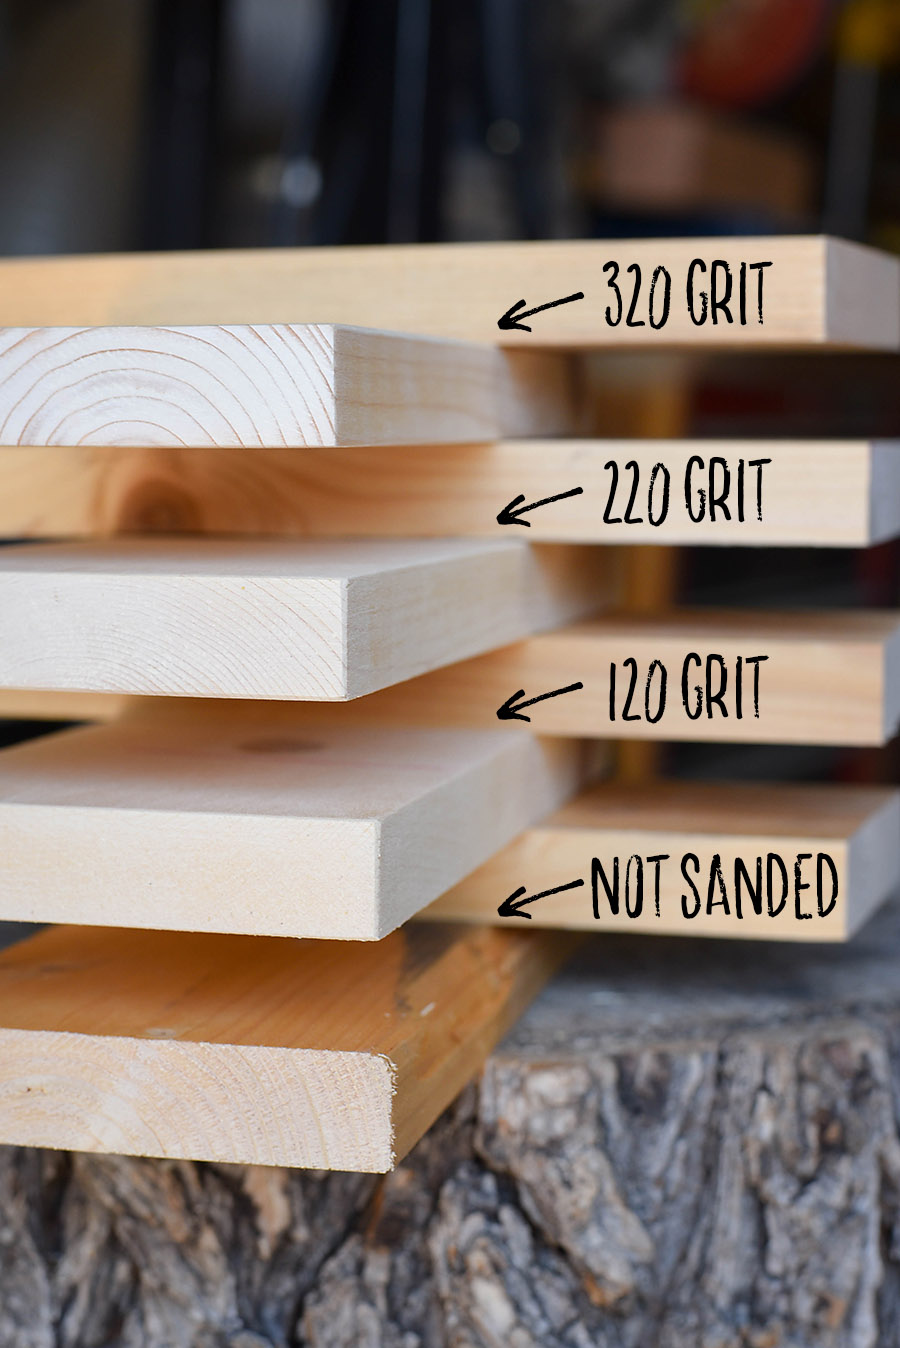
If you’re using construction grade lumber from a home improvement store, start with 80 grit sand paper to knock off the rough edges and obvious flaws. Then go over the wood with 120 or 150 grit for a smoother surface. If you’re painting, you can stop here because the paint will fill in any marks left from the sand paper.
 Go over the piece with 220 grit if you plan to use stain. If you want your piece to be very smooth with a glossy or clear glass finish, you may also want to use a 320 grit.
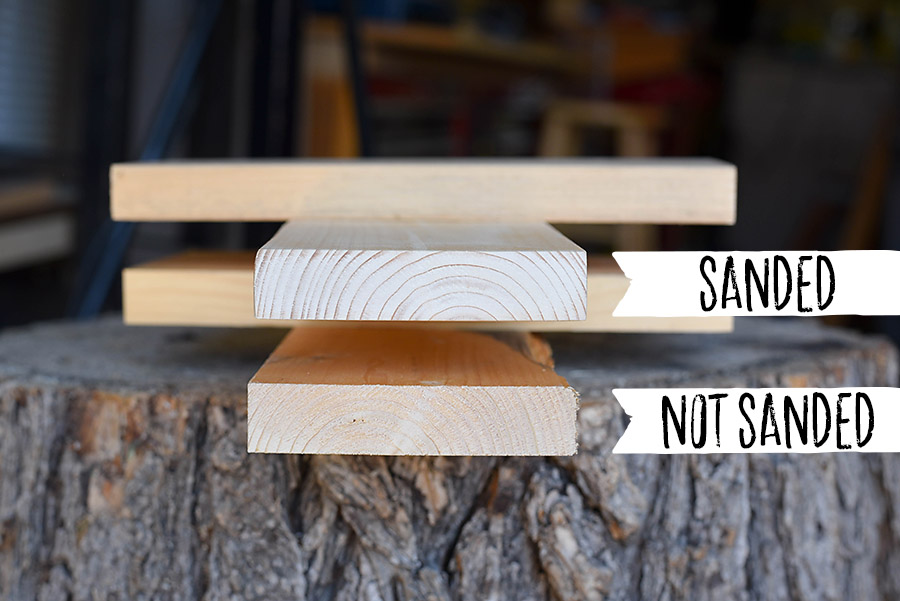
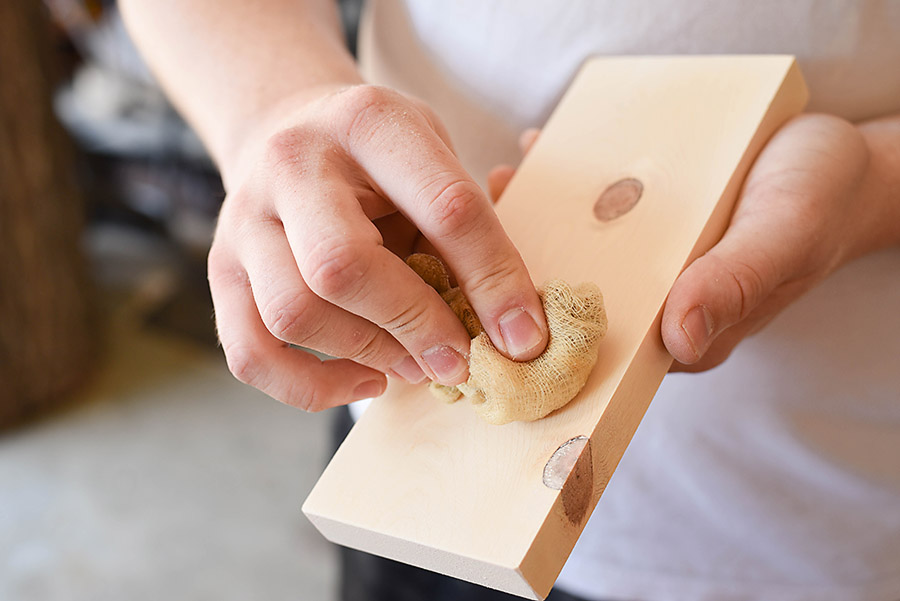
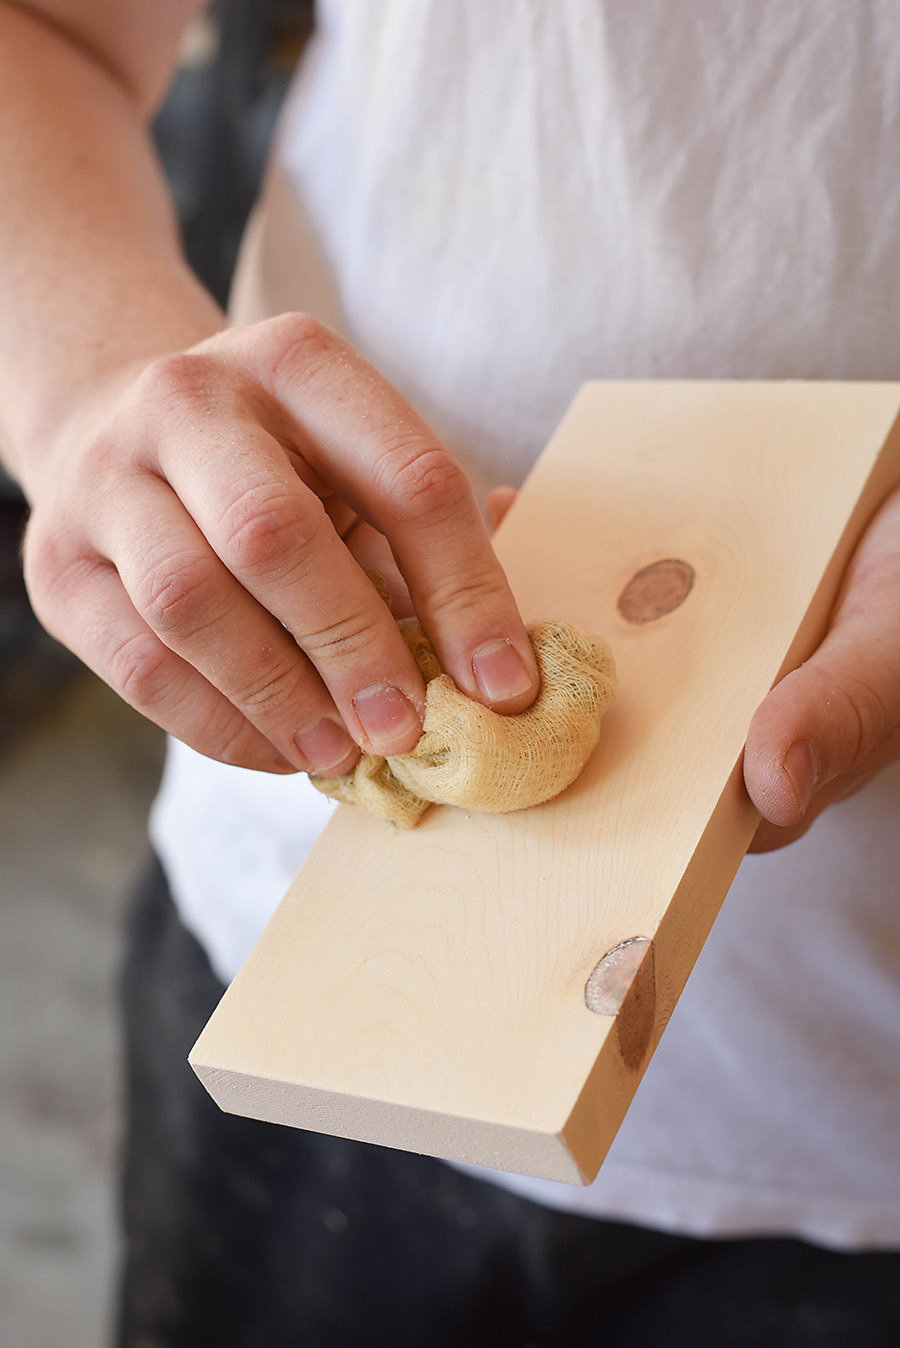
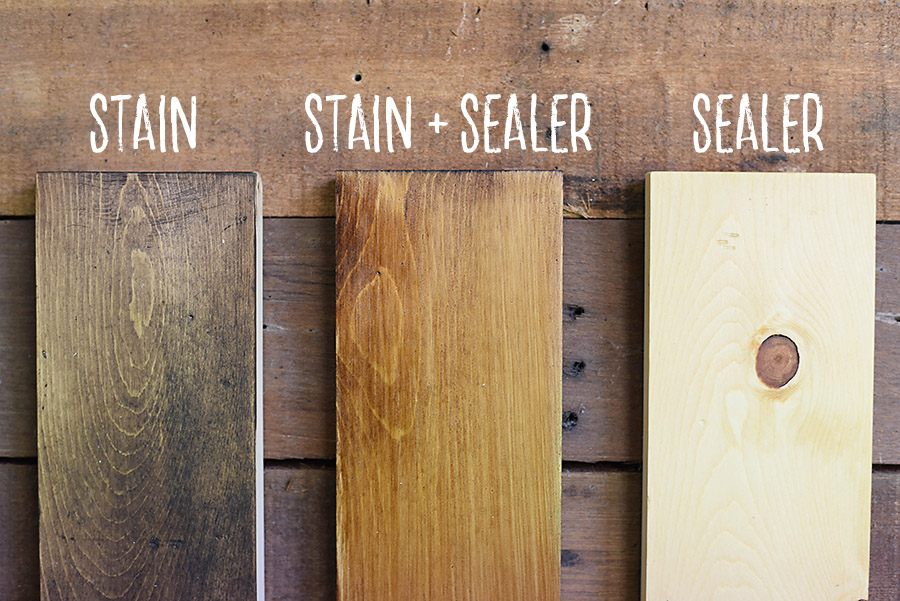
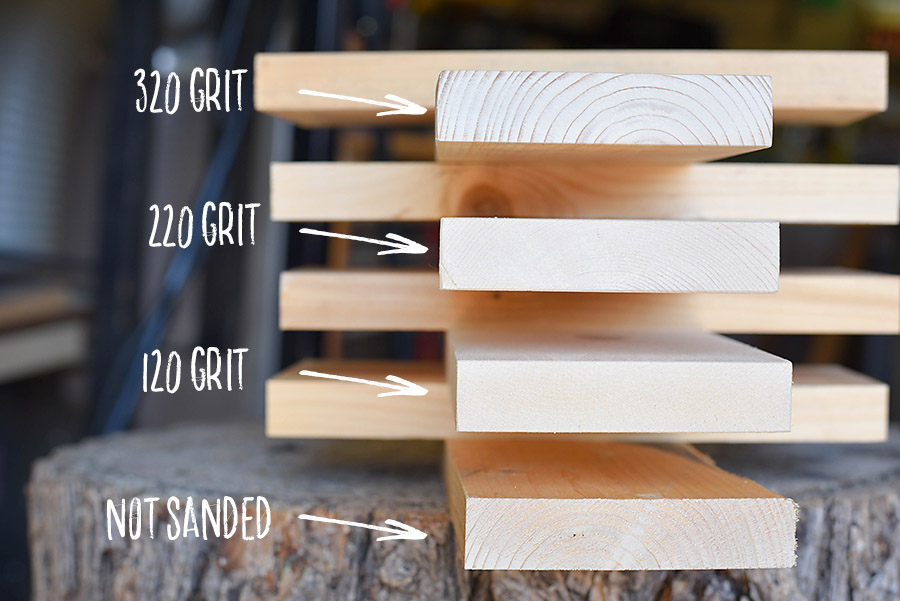 Check out the difference in sanding in the photo below:
Tools
Of course, you can sand by hand and if you’re refinishing a delicate piece, hand sanding might be the best option.
If you’re ready to purchase a power tool to make your life easier, a random orbit sander is going to be a fantastic choice. There is an easy learning curve, but you won’t outgrow it. It’s useful tool both for beginners and advanced users. A random orbit sander is a tool that will work hard for you, so you get a lot of bang for your buck. It’s especially nice for beginners because the sanding pattern is random, so you won’t have to pay attention to grain direction, unlike other sanders. It’s also easy to control.
The other sander we would recommend is a belt sander. It’s a more powerful tool for faster removal of material. It’s pretty aggressive, so you can do a lot of shaving really quickly. A bonus is that you can use it as a hand tool or you can turn it upside down, clamp it to a table, and it becomes a stationary sander for smaller pieces.
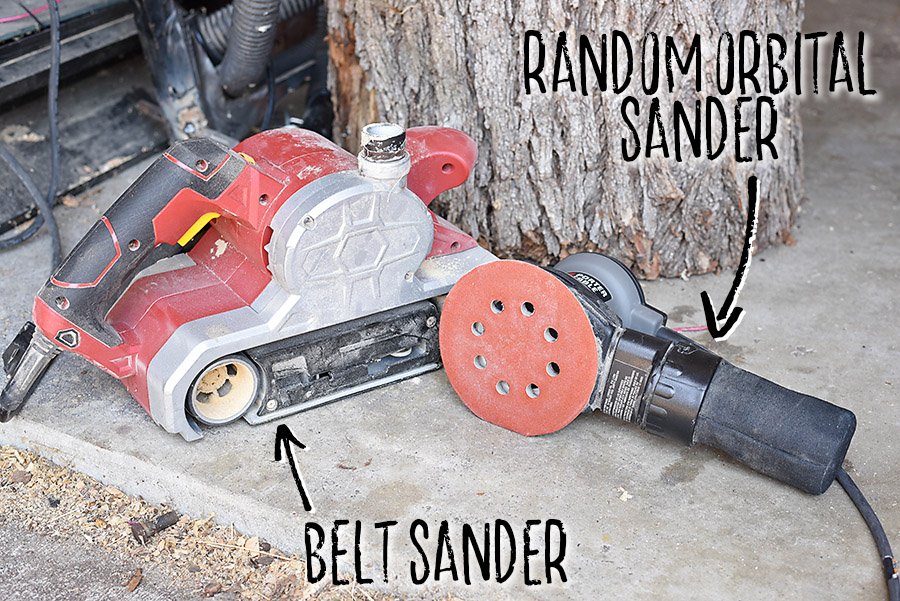
While there are specific uses for other sanders like a pad sander or a detail sander, the random orbit sander and belt sander will be sufficient for most projects.
Prep the Wood
Once you’ve sanded your wood, there are several different ways you can remove the dust. Sometimes we blow the dust off with compressed air or vacuum it with a brush attachment.
Then wipe the wood down with a tack cloth, which is a sticky mesh cloth ideal for removing every little bit of sawdust.
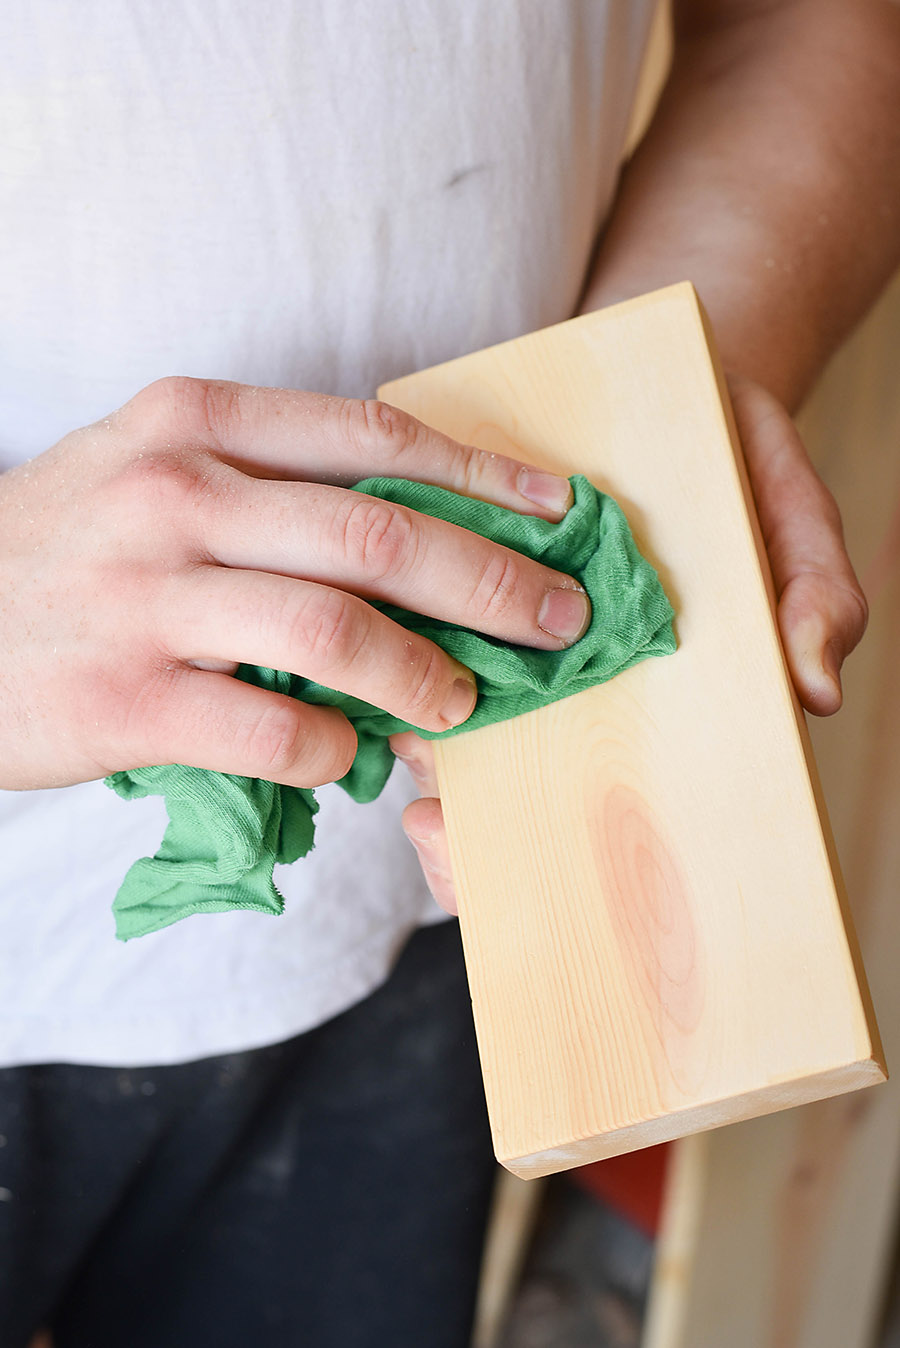
 Sometimes instead of using tack cloth, you can use a clean rag to wipe the wood down with mineral spirits or a solvent. Stay away from wiping the wood down with water because water can raise the grain after you’ve already sanded the wood.
Stain the Wood
Staining wood is my favorite part of the whole process. There’s something so peaceful and almost zen about watching the wood grain emerge through a rich, dark stain. It feels like watching your piece come to life. My husband prefers to skip this step entirely and simply clear coat the wood, highlighting the natural color of the wood.
Stain is often used to imitate high quality wood. It can mask construction grade lumber and make it look more like a rich oak or walnut. But (as my husband would tell you), there is no real substitute for high quality wood. If you can find a local sawmill, a hardwood dealer, or someone who reclaims wood, you will fall in love with the natural color of lumber.
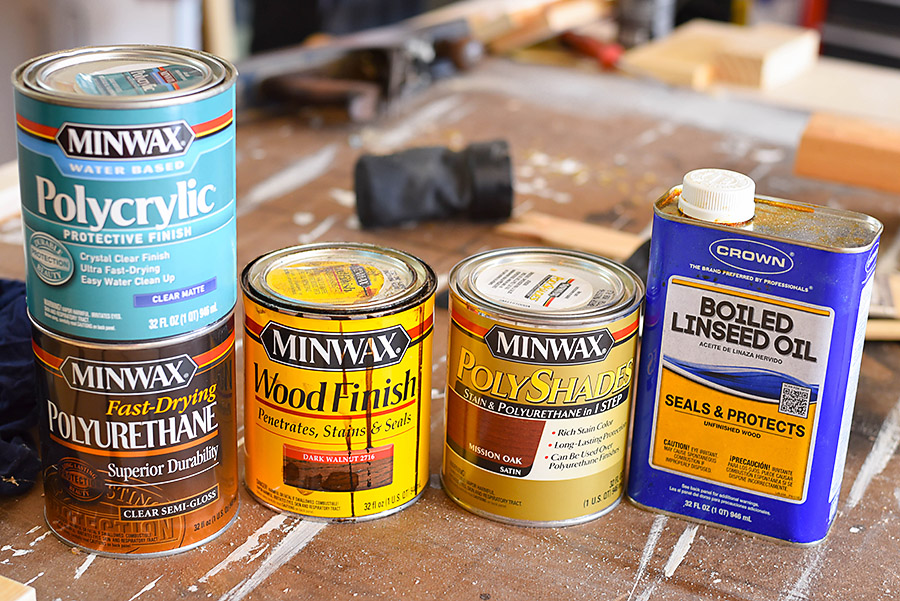
For those of us who love stained wood, different types of stain work better for different projects, but in general I love to use an oil based stain or a stain + sealer combo.
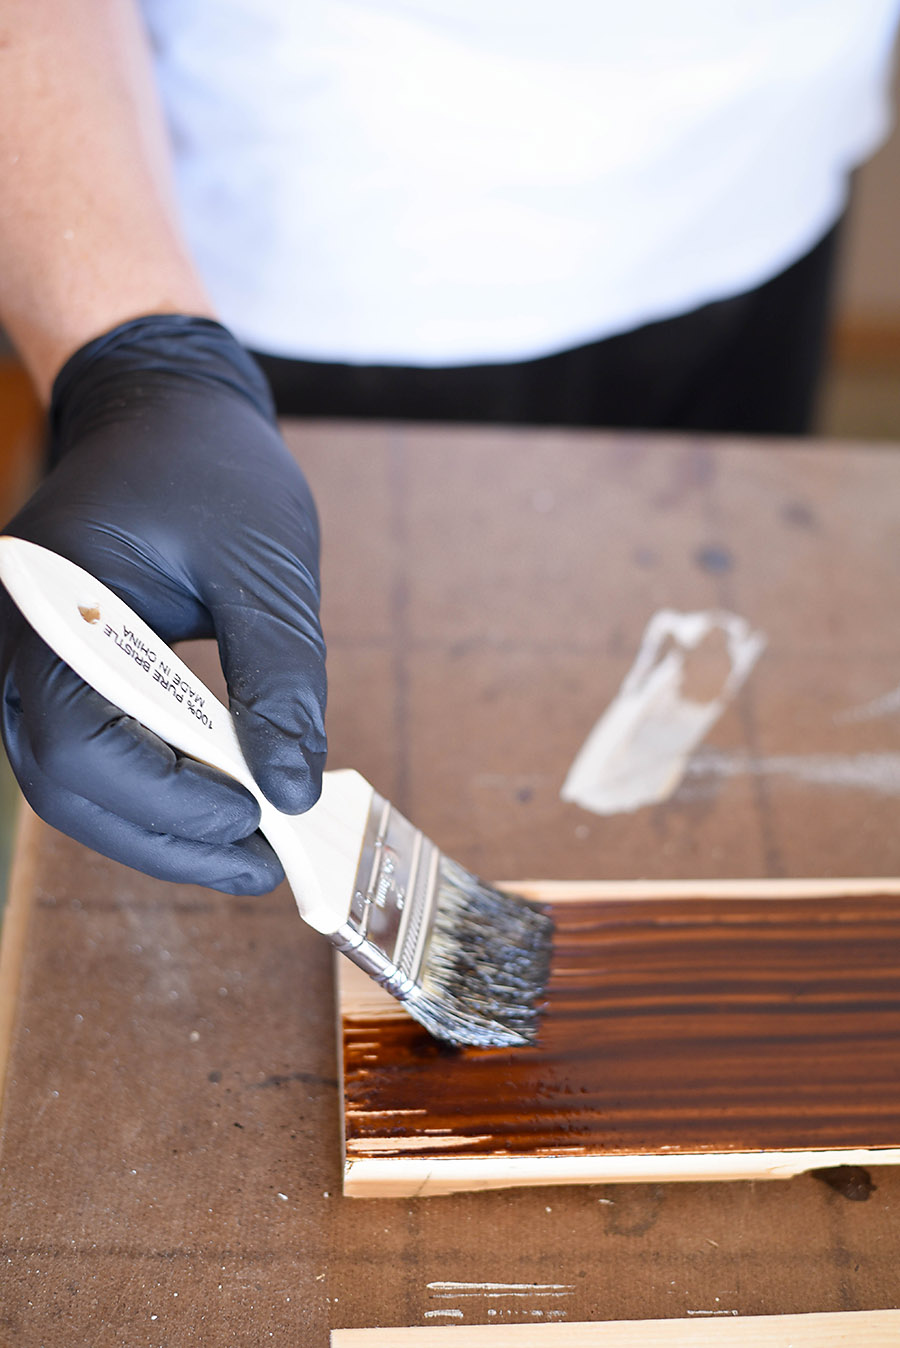
Always follow the manufacturers instructions for applying your stain (you’ll find instructions on the can) but there are a few general principals that apply to most stain types. You might be tempted to shake the can, but opt for a paint stick and stir it for several minutes. Make sure it is stirred well because the pigment (color) can settle to the bottom, especially if it hasn’t been used for awhile.
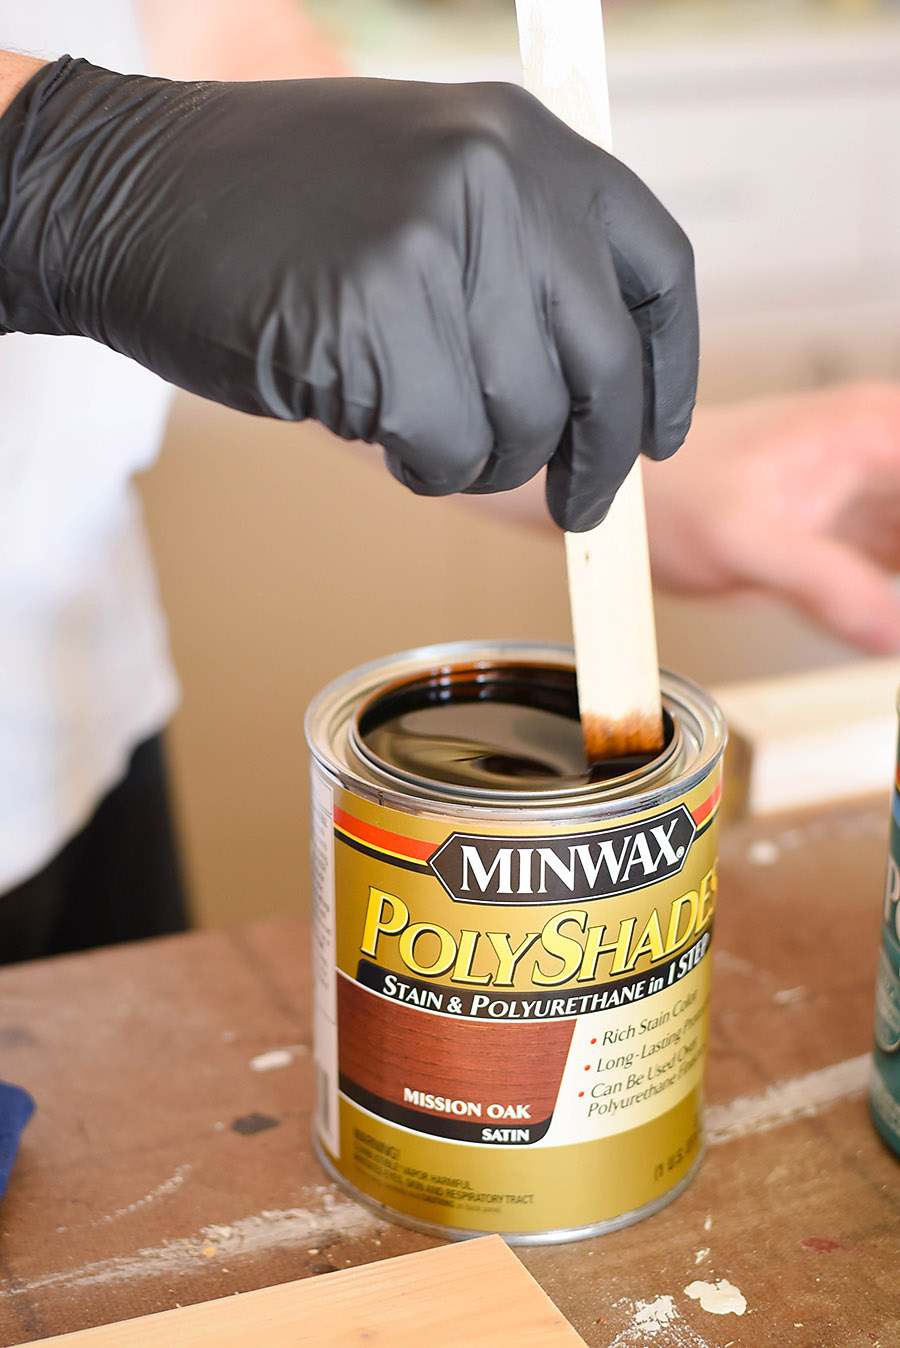
Stain + sealer contains both the wood stain and a wood sealant, making an easy, one-step choice. Simply apply a couple of coats of stain + sealer with a brush and you’re done.
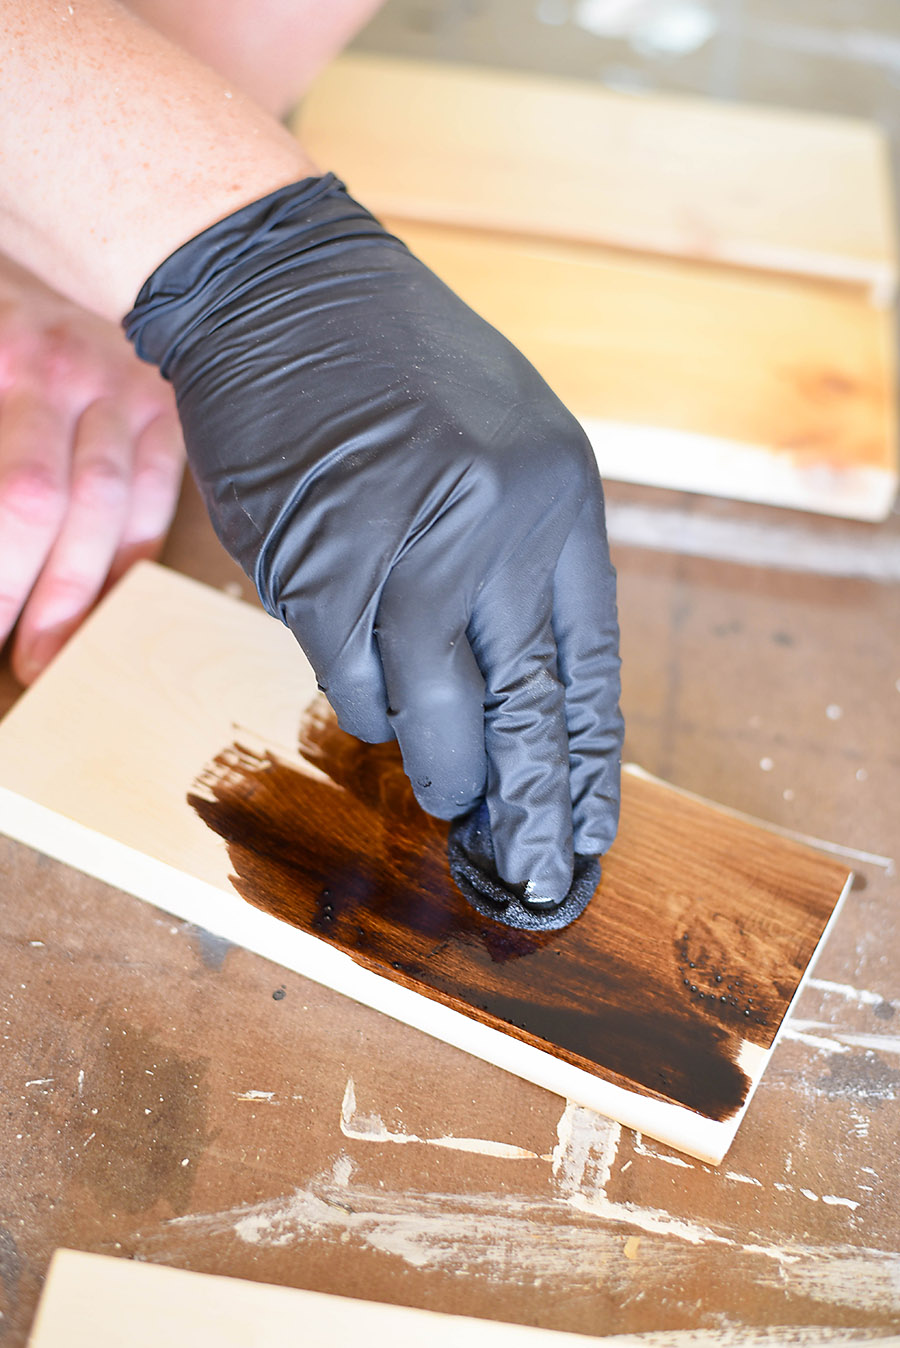
My husband will always choose an oil based stain if he chooses to stain wood. Oil based stains are best applied with a clean rag. Simply dip the rag in the stain and wipe the wood going with the grain. Let the stain set for a few minutes, then wipe off the excess with a clean, dry cloth to avoid a blotchy finish. Stain by itself will not protect the wood, so you’ll want to finish your project with a top coat.
Protect the Wood
There are several different kinds of top coating like water-based finishes, oil-based finishes, and other natural finishes, but our favorites are polycrylic, wipe-on polyurethane, and boiled linseed oil.
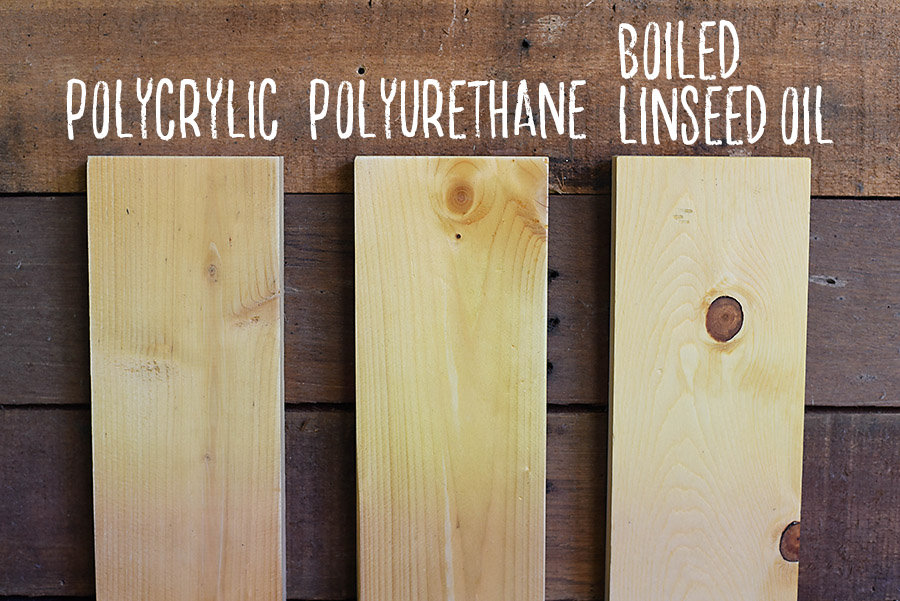
Linseed Oil
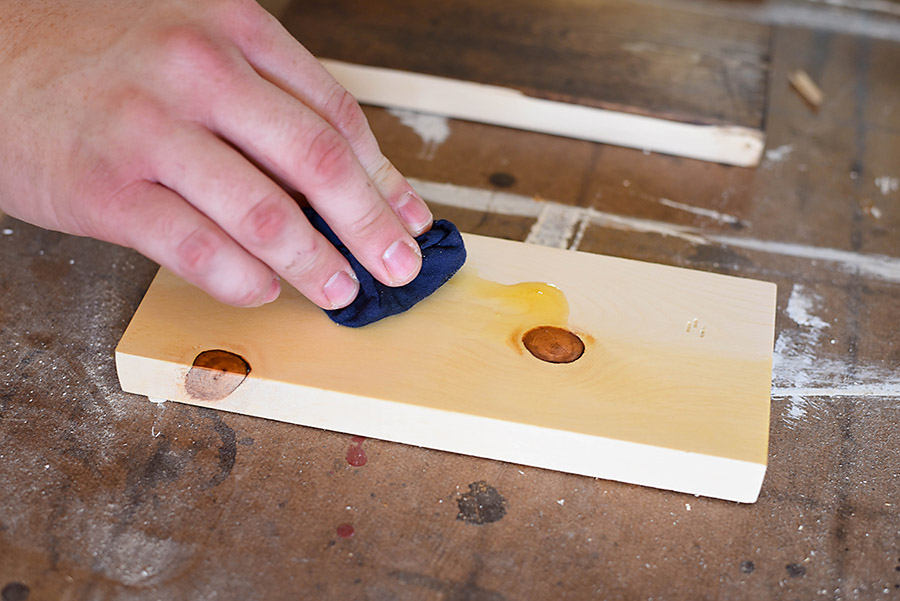
Boiled linseed oil (BLO) is a natural product that come from the flax plant. Use this when you want to highlight the natural wood without a thick coating. It’s a protectant because it will repel water, but it won’t protect from scratches or heat and it will need to be re-applied periodically. Boiled linseed oil is applied with a clean rag. Let it soak for 10 minutes and wipe off the excess. You can apply multiple coats to build up a bit of a finish.
Wipe-On Polyurethane
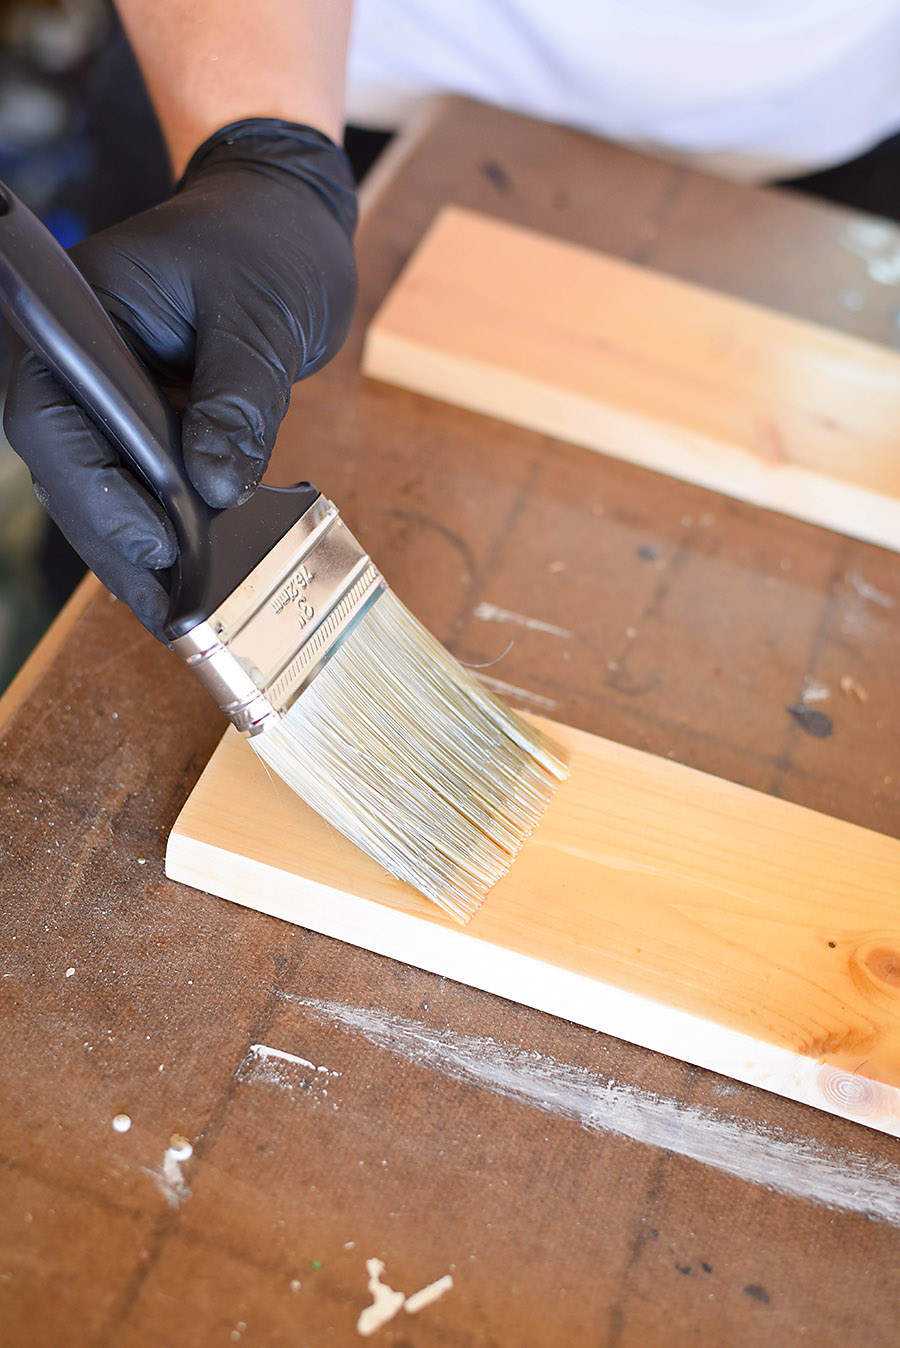
Oil-based wipe-on polyurethane is a durable finish. It’s a bit thinner than regular polyurethane, so it’s ideal for wiping directly onto a wood piece. You can choose a satin or gloss finish. We only use polyurethane when durability is an issue. It has a slight amber tint and because of the oil, it’s a good choice for tables and surfaces that may get wet. Wipe-on polyurethane is can also be applied with a natural bristle brush or a foam brush, which must be cleaned with mineral spirits. If you want a good finish, very lightly sand between layers of polyurethane with a 320 grit sandpaper just to knock down high spots.
If you have a small project (and a well-ventilated area), you might like using spray Polyurethane. But beware – my husband tried to coat a coffee table using spray Polyurethane and it took four cans!
Polycrylic
Polycrylic is almost a middle ground between a natural oil and a polyurethane. It offers more protection than boiled linseed oil, but it’s not quite as water resistant as oil-based polyurethane. It dries faster than polyurethane and because it is water-based, there is no amber tint. Polycrylic is applied with a high quality synthetic brush. It’s easy to clean up because it is water-based, so brushes can simply be washed out with water.
Notes
Every project will be a little different, and you should always follow the manufacturers instructions, but hopefully this will be a good starting point for many DIY projects! I hope you enjoyed this beginner’s guide to DIY – learning to sand, prep, and stain wood. If you have any questions, leave them in the comments below and we will answer them as soon as we can!
2 thoughts on “Beginners Guide to DIY: How to Sand, Prep, and Stain Wood”